How to Install an Internal Hard Drive
 By Theo LangUpdated
To install an internal hard drive, shut down the PC, unplug it, open the case, mount the drive in a free bay, connect a SATA data cable and a SATA power cable, then close the case, boot up and format the drive in your operating system. The steps below walk through each part.
Shut down and unplug the PC
Shut the PC down fully, then unplug the power cable from the wall and from the PC. Follow your PC maker's manual for opening the case. Touch a bare metal part of the case before handling the drive, so static does not reach its circuits. Keep the screws and the side panel together while you work.
Mount the drive in a bay
Find a free drive bay in the case and slide the drive in with its connectors facing the open side, where the cables can reach them. Fasten the drive with the screws that came with the case or the drive, and make sure it sits firm without forcing it. A drive that moves around can pull its cables loose, so check that it does not wobble before you move on.
Connect the SATA data and power cables
Plug a SATA data cable into the small connector on the back of the drive, then plug the other end into a SATA port on the motherboard. Your motherboard manual shows where the SATA ports sit. Then plug a SATA power cable from the power supply into the wider connector on the drive. Push each connector in straight until it sits flat, and do not force a plug that does not fit.
Close the case and boot up
Put the side panel back on and fasten it, then plug the power cable back in and switch the PC on. Watch for the drive in your operating system's disk tool or in the startup screens. If the drive does not appear, shut the PC down, unplug it again and check that the cables are seated. Do not open the power supply itself; if it has a fault, contact its maker.
Format the drive before use
A new drive needs formatting before it can store files. Open your operating system's disk tool, find the new drive, and format it with the file system your operating system suggests. Formatting erases everything on the drive, so be sure you picked the new drive and not an old drive with files on it. To move files from an old drive, cloning software can copy them: the Seagate BarraCuda 2TB lists free DiscWizard software, and the WD Blue lists free Acronis True Image WD Edition.
What you need

Western Digital WD161KFGX
A 16TB 3.5-inch SATA drive with a 7200 RPM spindle, 512 MB cache and a 5-year manufacturer's limited warranty, built for RAID-optimized NAS systems.
View on Amazon
Seagate 8TB BarraCuda Internal Hard Drive
An 8TB SATA drive for desktop storage, with a 2-year limited warranty and a 2-year Rescue plan, listed for everyday PC storage and gaming.
View on Amazon
Seagate BarraCuda
A 2TB 3.5-inch SATA drive at 7200 RPM with a 256MB cache and a 2-year limited warranty, with free DiscWizard software for cloning an old drive.
View on Amazon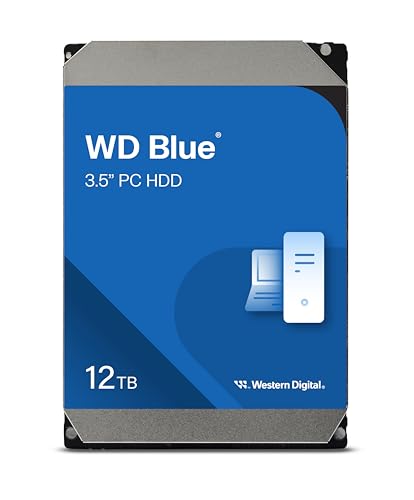
Western Digital WD120EAGZ
A 12TB 3.5-inch SATA drive at 7200 RPM with a 512 MB cache and a 2-year limited warranty, with free Acronis True Image WD Edition cloning software.
View on AmazonThese come from our ranked list Best Internal Hard Drive, which compares them spec by spec.
FAQ
Do I need to format a new internal hard drive?
Yes. Formatting prepares the new drive for your operating system to store files on it. Use your operating system's disk tool to format the drive after the PC detects it.
What cables does an internal SATA hard drive need?
A SATA data cable from the drive to the motherboard and a SATA power cable from the power supply. Check your power supply manual for its SATA power cables before buying an adapter.
Can I move my files from my old drive to the new one?
Yes, with cloning software. The Seagate BarraCuda 2TB lists free DiscWizard software for migrating data from an old drive, and the WD Blue lists free Acronis True Image WD Edition cloning software.