
How to Connect a CPU Fan to a Motherboard
 By Theo LangUpdated
Connect the CPU fan cable to the CPU_FAN header on the motherboard, which sits near the CPU socket. A 3-pin plug fits the header one way, and a 4-pin plug fits the same header, with the extra pin for PWM speed control. Push the plug down until it seats fully, then check that the fan spins when you power on the PC.
Shut down and unplug the PC
Shut the PC down and unplug it from the wall before you touch anything inside the case. Open the side panel by following the steps in your case manual, then find the CPU socket and the CPU_FAN header next to it. The header is a small row of pins on the motherboard, labeled CPU_FAN in print beside it. Keep the fan cable clear of the fan blades and other parts while you work.
Match the plug to the header
CPU fan plugs come with 3 pins or 4 pins, and both fit the CPU_FAN header. Line up the plastic tab on the plug with the notch on the header so the plug can only go on one way. A 3-pin plug leaves one pin of the header open, while a 4-pin plug covers all four pins and adds PWM speed control. Never force the plug; if it does not slide on, turn it around and check the tab again.
Seat the plug and route the cable
Push the plug straight down onto the header until it sits flat and the tab clicks into the notch. Give the cable a light tug to confirm it holds, then route the cable away from the fan blades and the heatsink fins so it cannot catch or rub. Use a cable tie or the case clips to keep the slack clear of moving parts. Close the side panel only after the cable is clear.
Power on and check the fan
Plug the PC back in and power it on, then watch the CPU fan to confirm it spins. Listen for a steady hum and check that the blades turn freely without hitting the cable. If the fan does not spin, shut the PC down, unplug it, and reseat the plug on the CPU_FAN header. If the fan still does not spin, check your motherboard manual for the CPU_FAN header position and confirm the plug is on CPU_FAN, not a case fan header.
What you need
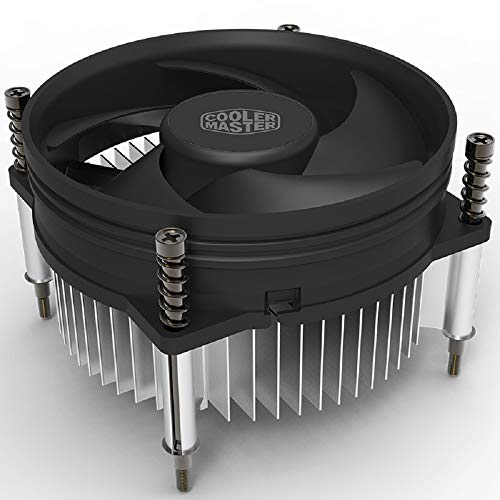
Cooler Master i30 CPU Cooler
A 92mm cooler with a 3-pin fan connector, a 2200 RPM fan speed and a 22dBA noise level, made for Intel LGA 1150, 1151, 1155 and 1156 sockets.
View on Amazon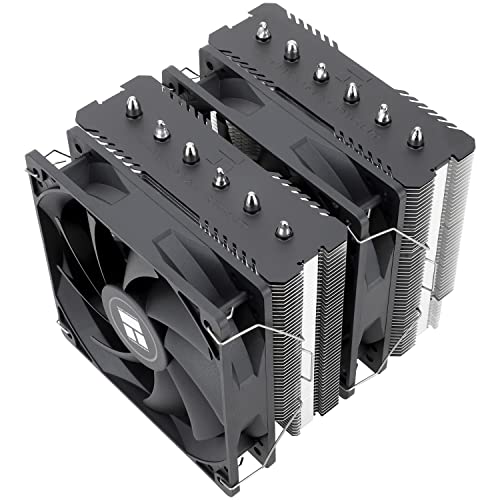
Thermalright Peerless Assassin 120 SE CPU Cooler
A dual-tower air cooler with two 120mm PWM fans, a 4-pin power port, 1550 RPM speed and 6 heat pipes, for AMD AM4 and AM5 and Intel LGA 1700.
View on Amazon
Thermalright Assassin X120 Refined SE CPU Air Cooler
A single-tower air cooler with a 120mm PWM fan, a 4-pin power port, 1550 RPM speed and 4 heat pipes, for AMD AM4 and AM5 and Intel LGA 1700.
View on Amazon
Cooler Master Hyper 212 Black II CPU Air Cooler
A 120mm PWM fan cooler with 4 heat pipes, up to 1,750 RPM and 75.19 CFM, for AMD AM5 and AM4 and Intel LGA 1851 and 1700.
View on AmazonThese come from our ranked list Best CPU Fan Cooler, which compares them spec by spec.
FAQ
Can a 3-pin CPU fan plug into a 4-pin header?
Yes. The 3-pin plug lines up with the tab and notch on the header and leaves one pin open. The fan spins at full speed or follows the voltage the motherboard sends through the 3-pin plug.
What happens if the CPU fan is plugged into the wrong header?
The fan may still spin, but the motherboard may warn that no CPU fan is connected, since it reads the CPU_FAN header for the cooler. Move the plug to CPU_FAN and check the fan spins when you power the PC on.
Do I need to plug in the CPU fan before turning on the PC?
Yes. Connect the fan to the CPU_FAN header before you power on, so the cooler runs from the first moment the CPU is under load. Powering on without the fan connected can trigger a warning or shut the PC down.


