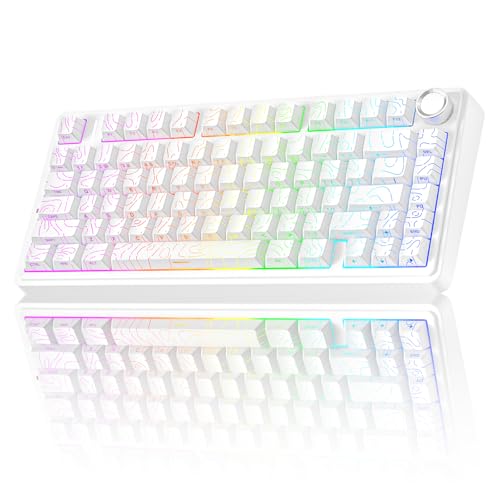
How to Clean Keyboard Keycaps
 By Theo LangUpdated
Pull the keycaps off with a keycap puller, soak them in warm water with a drop of dish soap, scrub them gently, rinse, and let them dry fully before you put them back. Unplug the keyboard first and photograph the layout so each cap returns to the right key.
Unplug the keyboard and photograph the layout
Unplug the USB-C cable from the keyboard, or switch off the wireless connection and remove the receiver if the board uses one. Take a clear photo of the full layout from above, including the number pad and any small keys at the edges. The photo is your map for putting every cap back on the right switch. Keep the keyboard on a flat surface with room to set the caps aside as you work.
Pull the keycaps off with a puller
Fit a keycap puller over a cap, squeeze the wires under its edges, and pull straight up with steady pressure. Work across the board row by row and drop the caps into a bowl or tray so none roll away. The SOLAKAKA A99 Pro includes a keycap puller for this step. Do not twist a cap or pry it with a screwdriver, since that can crack the stem or scratch the board.
Soak the keycaps in soapy water
Fill a bowl with warm water and add a small drop of dish soap, then put the keycaps in and let them soak. Rub each cap between your fingers or with a soft brush to lift dust and grime from the sides and the stem. Rinse the caps under clean running water until the water runs clear and no soap stays on the plastic.
Dry the keycaps fully before refitting
Shake the water off the caps and spread them upside down on a clean towel so air reaches the stems. Leave them until they feel dry to the touch and no water stays inside a stem, since trapped water can drip onto the switches below. Do not use a hair dryer on a hot setting, and do not refit a cap that still feels damp.
Wipe the board and refit the caps
While the caps dry, wipe the exposed board with a dry cloth to lift dust from between the switches. Use the photo you took to put each cap back on the right switch, pressing straight down until it seats. Press every key once to check that each cap sits level and no key sticks.
What you need

AULA S99 Gaming Keyboard
A 96% membrane keyboard with 99 keys and a number pad, with RGB backlight and a 1-year manufacturer warranty.
View on Amazon
YUNZII B98 PRO 96% Wireless Mechanical Keyboard (Blue
A hot-swappable 96% keyboard with double-shot PBT keycaps and 100 keys, so the caps swap off for washing without soldering.
View on Amazon
SOLAKAKA A99 Pro Mechanical Keyboard
A hot-swappable 96% keyboard with double-shot PBT keycaps, 97 keys and a keycap puller in the box.
View on Amazon
KiiBoom Phantom98 Lite 96% Wireless Mechanical Gaming Keyboard
A hot-swappable 96% keyboard with 97 keys, so the switches change without soldering while the caps are off for washing.
View on AmazonThese come from our ranked list Best 96 Keyboard, which compares them spec by spec.
FAQ
Can you wash keycaps in a dishwasher?
No. Dishwasher heat and harsh detergent can warp or fade the caps, and the jets can crack a stem. Hand wash the caps in warm soapy water and let them air dry on a towel.
How often should you wash keycaps?
Wash them when they look dirty, feel sticky, or a key starts to stick. A board used every day gathers dust and skin oils on the caps, so a wash when grime shows keeps the board clean.
Can you wash the keyboard itself?
No. Keep water off the board, the switches and the cable. Wipe the exposed board with a dry cloth while the caps are off, and let the caps dry fully before you refit them.