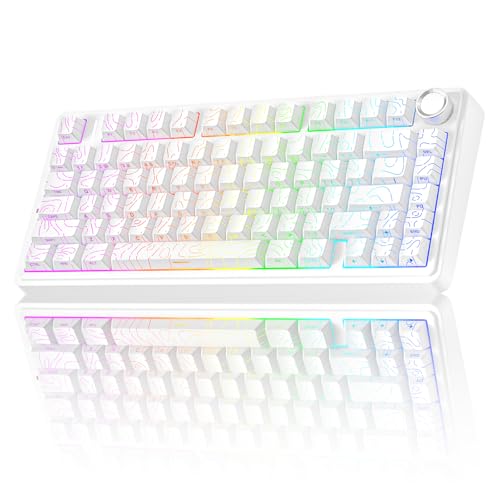
How to Remove and Clean Keyboard Keys
 By Theo LangUpdated
To remove and clean keyboard keys, unplug the keyboard, pull each keycap straight up with a keycap puller, wash the keycaps in warm soapy water, brush the dust off the board underneath, and press the dry keycaps back on. Take a photo of the layout first so every key goes back in its place.
Unplug the keyboard first
Disconnect the keyboard from the computer or switch it off, so no key press registers while you work. Take a photo of the full layout with your phone before you pull anything, since rows of similar keycaps are easy to mix up. Work on a clean, dry surface with room to lay the keycaps out in order, and check the maker's manual for your model before you start.
Pull the keycaps straight up
Fit a keycap puller over each keycap and pull straight up with steady pressure. Pull wide keys such as the spacebar, Shift and Enter evenly from both sides, since they also sit on stabilizers under the cap. If a keycap resists, stop and check the manual instead of prying, since clips under a keycap can break and leave the key loose.
Wash and dry the keycaps
Wash the keycaps in warm water with a drop of mild soap, using a soft brush to reach the sides and the stems underneath. Rinse the soap off, shake off the water and lay the keycaps upside down on a towel. Let them dry fully before refitting, since water trapped under a keycap can reach the switch and stop the key working.
Clean the board under the keys
With the keycaps off, brush dust and crumbs off the plate and around the switches with a soft brush, or use short bursts of compressed air to blow debris out. Wipe sticky spots with a cloth that is only slightly damp, and keep liquid away from the gaps around the switches. Let the board dry fully before any keycap goes back on.
Refit the keycaps and check each key
Match each keycap to your layout photo and press it down until it seats on the switch stem. Wide keys also need to seat on both stabilizer stems, so press both ends and check the key sits level. Plug the keyboard back in and press every key a few times to check it presses and releases cleanly. A key that sticks or sits crooked needs to come off and go back on straight.
What you need

AULA S99 Gaming Keyboard
A membrane keyboard that does not support hot-swapping, so key cleaning stays with the keycaps and the board surface.
View on Amazon
YUNZII B98 PRO 96% Wireless Mechanical Keyboard (Blue
A hot-swappable keyboard with pre-lubed switches, so keycaps and switches come out for a deeper clean.
View on Amazon
SOLAKAKA A99 Pro Mechanical Keyboard
A hot-swappable keyboard that comes with a keycap puller for lifting the keycaps straight up.
View on Amazon
KiiBoom Phantom98 Lite 96% Wireless Mechanical Gaming Keyboard
A hot-swappable keyboard with pre-lubricated stabilizers, so wide keys lift off their stabilizers for cleaning.
View on AmazonThese come from our ranked list Best 96 Keyboard, which compares them spec by spec.
FAQ
Can I remove keycaps from any keyboard?
Check the maker's manual for your model first. Keycaps on mechanical keyboards pull straight up with a puller, while a membrane keyboard may only allow surface cleaning, so follow the manual instead of forcing a cap.
How do I clean sticky keys?
Pull the keycap, wash it in warm soapy water and dry it fully, then wipe the edges around the switch with a cloth that is only slightly damp. Refit the cap only when both the cap and the board feel dry.
What if a key stops working after cleaning?
Take the keycap off again and check that it seats straight on the switch stem, and let the board dry longer if any dampness remains. If the key still fails and the keyboard is under warranty, contact the maker for advice.