How to Clean a Gaming Keyboard Properly
 By Theo LangUpdated
To clean a gaming keyboard properly, unplug it or switch it off, then remove loose dust and crumbs before wiping the keys and the surface. Lift the keycaps off if your keyboard allows it, clean around the switches, and let every part dry before you put the keys back and plug the keyboard in again. Work gently so you do not damage the switches or the keycaps.
Unplug the keyboard first
Shut the keyboard down by unplugging the cable or switching off the wireless connection, and remove it from the desk so crumbs fall away from other gear. Turn it upside down over a bin and tap the back lightly to shake out loose dust and crumbs. Check the manual for your model before you pull any keycaps, since some keyboards hold keys in place and forcing them can break the stems.
Remove the keycaps carefully
Use a keycap puller if you have one, and lift each key straight up instead of twisting it to one side. Place the keycaps in a bowl in the order you removed them, or take a photo of the layout first so every key goes back in the right place. Set aside any key that feels stuck and check the manual rather than pulling harder.
Clear dust from the switches
Hold a can of compressed air upright and use short bursts to blow dust from around the switches and out of the gaps between them. Keep the nozzle a short distance from the board and move across the keyboard in rows so you cover the whole surface. Brush away crumbs that stay behind with a soft brush, and do not press down on the switches while you clean.
Wipe the keycaps and the surface
Wash the keycaps in warm water with a small amount of mild dish soap, then rinse them and leave them on a towel until they are fully dry. Wipe the keyboard frame and the area around the switches with a cloth that is damp, not wet, and dry the surface right away. Never pour water on the keyboard or soak the board, since liquid inside the case can damage the switches.
Put the keyboard back together
Wait until the keycaps and the frame are dry to the touch before you refit anything. Press each keycap straight down onto its switch until it sits level with the keys around it, and check the layout against the photo you took. Plug the keyboard back in or switch the wireless connection on, then press each key once to check that it responds.
What you need

AULA F75 Pro Wireless Mechanical Keyboard
A 75% wireless keyboard with hot-swappable switches, side-printed PBT keycaps and RGB backlight, so you can lift the keycaps off for cleaning.
View on Amazon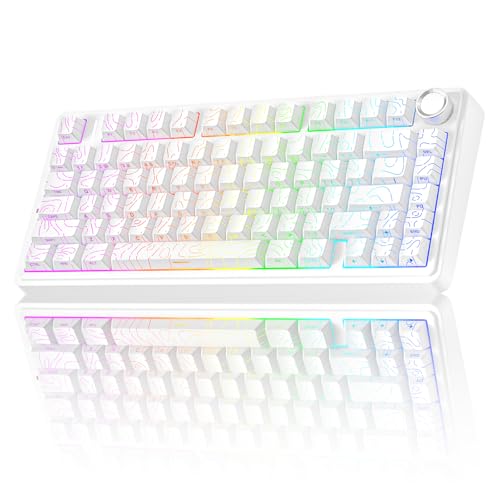
AULA F75 Pro Wireless Mechanical Keyboard
A 75% wireless keyboard with hot-swappable switches, side-printed PBT keycaps and RGB backlight, in a white finish.
View on Amazon
Redragon K521 Upgrade Rainbow LED Gaming Keyboard
A wired keyboard with 104 keys, rainbow LED backlight and a one-touch lighting button.
View on Amazon
Redragon Mechanical Gaming Keyboard Wired
A wired keyboard with hot-swappable red switches and double-shot PBT keycaps, so you can remove the keycaps to clean around the switches.
View on AmazonThese come from our ranked list Best Gaming Keyboard, which compares them spec by spec.
FAQ
How often should I clean my gaming keyboard?
Clean it when dust builds up between the keys, keys start to stick, or crumbs collect under the keycaps. A quick wipe and a shake-out keep the board clear between deeper cleans, and a full keycap removal suits a board that has not been cleaned for a while.
Can I wash the keycaps in water?
Yes, if your keyboard has removable keycaps. Wash them in warm water with mild dish soap, rinse them, and let them dry fully before you put them back. Keep the keyboard board itself dry and wipe it with a damp cloth instead.
What should I avoid when cleaning a keyboard?
Avoid pouring liquid on the board, soaking the keyboard, and using harsh cleaners or rough cloths that can mark the keycaps. Do not force a stuck keycap off, and let every part dry before you plug the keyboard back in.